Excel Macros for Beginners
What Macros Can Do For You
A macro is essentially a recording of your Excel actions that you can replay at any time. If you find yourself repeating the same sequence of operations over and over — formatting this report, cleaning that data export, building this chart — you've found a candidate for automation. Macros turn repetitive tasks into one-click operations, saving hours every week.
You don't need to be a programmer. Excel's Macro Recorder captures your keystrokes and mouse clicks, translating them into VBA (Visual Basic for Applications) code automatically. Once recorded, you run the macro via a button, keyboard shortcut, or workbook event.
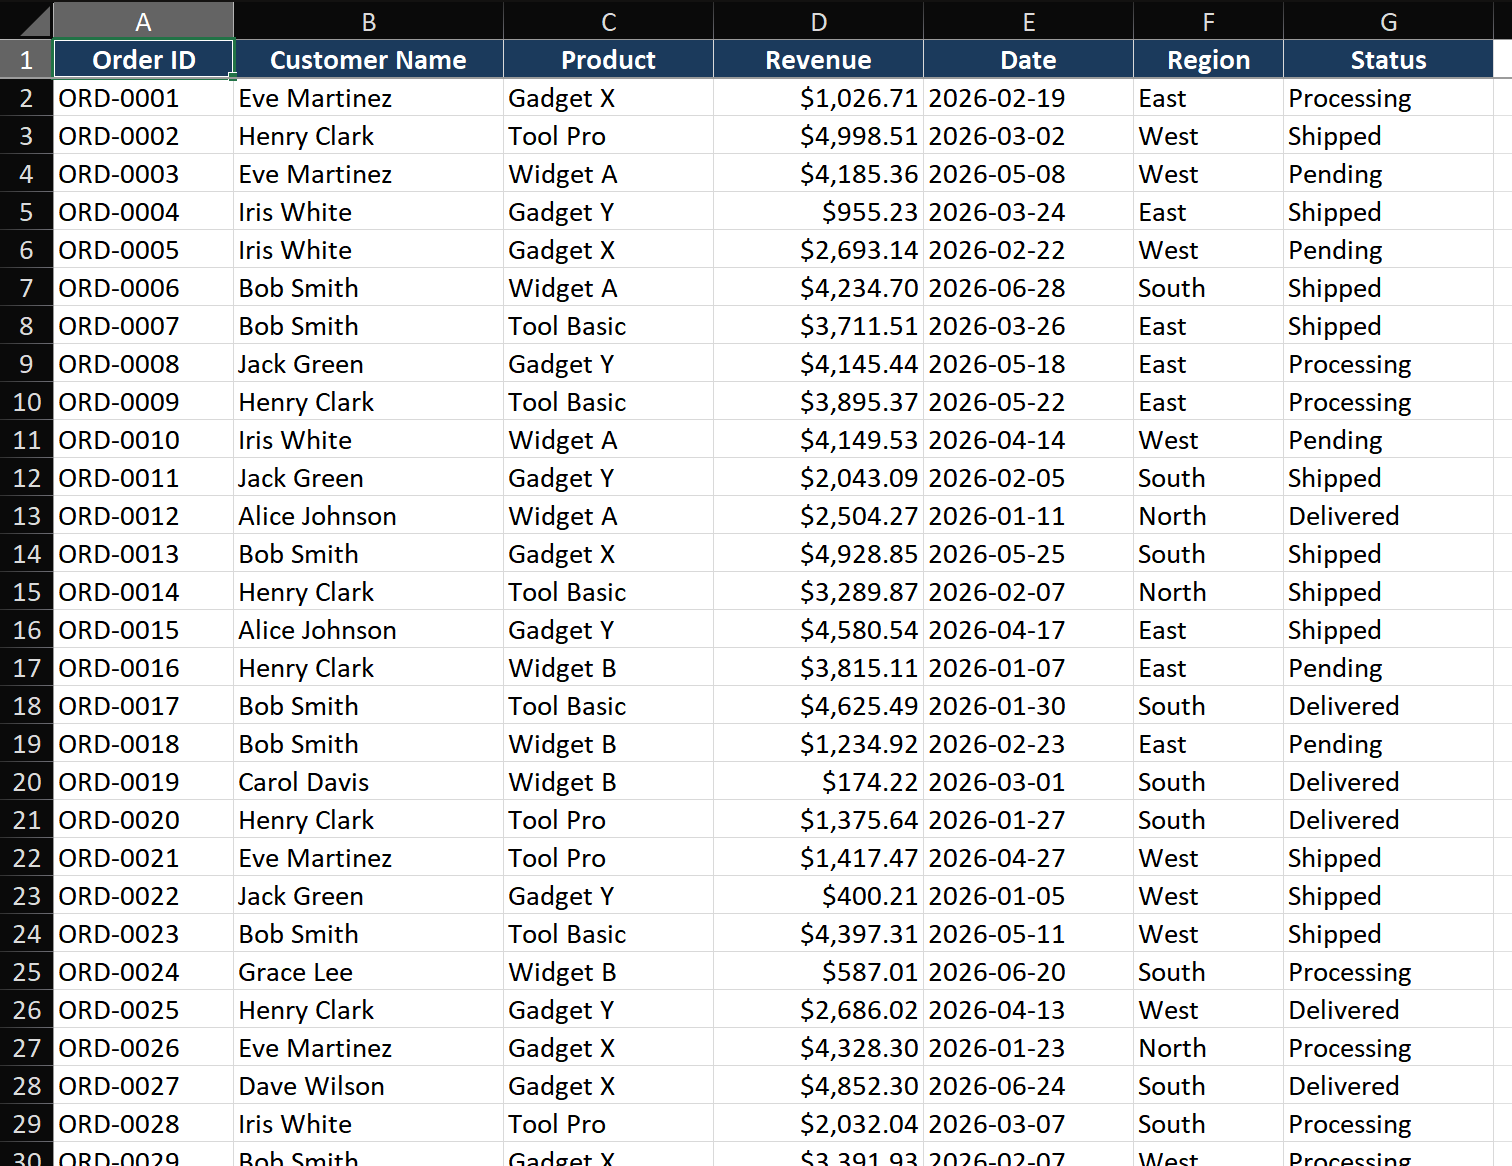
Step-by-Step: Record Your First Macro
Scenario: Every Monday you receive a raw sales report that needs the same formatting: bold headers, currency format on revenue column, auto-fit column widths, freeze top row, and add a totals row. Automate it.
Step 1 — Enable the Developer tab
- Right-click anywhere on the Ribbon > Customize the Ribbon.
- In the right panel, check Developer. Click OK.
- The Developer tab now appears in the Ribbon — this is your macro control center.
Step 2 — Plan and practice before recording
- The Macro Recorder captures every click and keystroke — including mistakes. Practice your exact sequence first without recording.
- For formatting a report, your sequence might be: select all (Ctrl+A), bold headers (Ctrl+B), format revenue column as currency (Ctrl+Shift+$), auto-fit columns (select all > double-click column boundary), freeze top row (View > Freeze Panes > Freeze Top Row).
- Practice each operation. Use keyboard shortcuts when possible — they produce cleaner VBA code than mouse clicks.
Step 3 — Record the macro
- Developer > Record Macro.
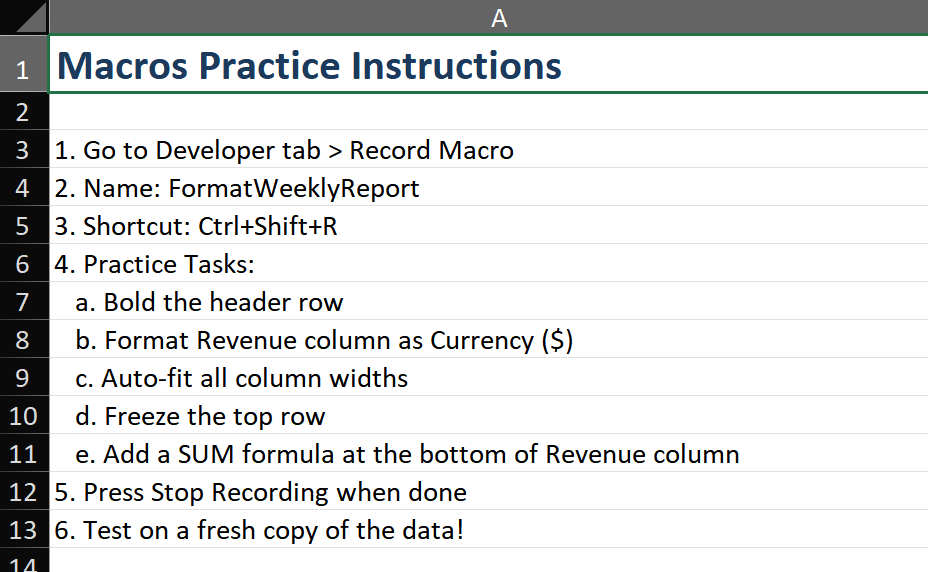
- Macro name:
FormatWeeklyReport(no spaces, descriptive). - Shortcut key: Ctrl+Shift+R (always use Ctrl+Shift to avoid overriding built-in shortcuts like Ctrl+C).
- Store macro in: Personal Macro Workbook if you'll use it across all files, or This Workbook if only for this file.
- Description: "Bold headers, currency format revenue, auto-fit columns, freeze top row, add totals."
- Click OK. Recording starts — the status bar shows a stop button.
Step 4 — Execute each formatting action carefully
- Press Ctrl+A to select all data.
- Apply bold to headers: select row 1, Ctrl+B.
- Format revenue column: select column C, Ctrl+Shift+$ (currency format).
- Auto-fit columns: press Ctrl+A, then double-click any column boundary in the header.
- Freeze top row: View > Freeze Panes > Freeze Top Row.
- Add totals row: select the last empty row below data, type
=SUM(C2:C100), format as bold and currency. - Click Developer > Stop Recording (or click the square stop button in the status bar).
Step 5 — Test on a fresh copy
- Create a copy of next week's raw report (always test macros on copies first — there's no Undo for macros).
- Press Ctrl+Shift+R (your assigned shortcut).
- Watch as Excel executes all formatting steps in under a second. Your weekly 5-minute task is now instant.
- If something went wrong: Developer > Macros > select your macro > Edit, to view and modify the VBA code.
Key Techniques
Technique 1 — Use relative references for flexible macros
By default, macros record absolute cell references (always select B2). For macros that should work from wherever your cursor is:
- Developer > Use Relative References (toggle it ON before recording).
- Now if you "move down 3 cells and type SUM," the macro repeats that relative movement regardless of starting cell — perfect for macros applied to different positions.
Technique 2 — Add a button to your worksheet
- Developer > Insert > Button (Form Control). Draw a rectangle on your sheet.
- The Assign Macro dialog appears — select your macro and click OK.
- Right-click the button > Edit Text to label it "Format Report."
- Buttons make macros discoverable for anyone opening the workbook — no need to remember keyboard shortcuts.
Common Mistakes
- Recording unnecessary actions. The recorder captures scrolling, accidental cell selections, and unintended formatting changes. Review recorded code (Alt+F11) and trim meaningless lines.
- Not disabling screen updating. Watching the macro flicker through every cell selection is slow and distracting. Add
Application.ScreenUpdating = Falseat the start andApplication.ScreenUpdating = Trueat the end for 5-10x speed improvement. - Macro security blocking your work. Excel blocks macros from untrusted sources by default. Save macro-enabled workbooks as .xlsm. When sharing, tell recipients to Enable Content when the security warning appears.
- No Undo available. Macros clear the Undo stack. Always test on a data copy first.
Advanced Tips
- Edit recorded code for efficiency: Recorded macros use
SelectandActivateheavily (slow). Edit to direct object manipulation: changeRange("A1").Select: Selection.CopytoRange("A1").Copy Destination:=Range("B1"). - Workbook events for auto-triggers: Use
Workbook_Open()to run a macro when a file opens, orWorksheet_Change()to react to cell edits. These eliminate manual macro execution entirely. - Custom functions with VBA: Write a VBA function like
Function Commission(Sales) As Double: Commission = Sales * 0.1: End Function, then use it in sheets as=Commission(A2). Extend Excel's formula library with your business logic.